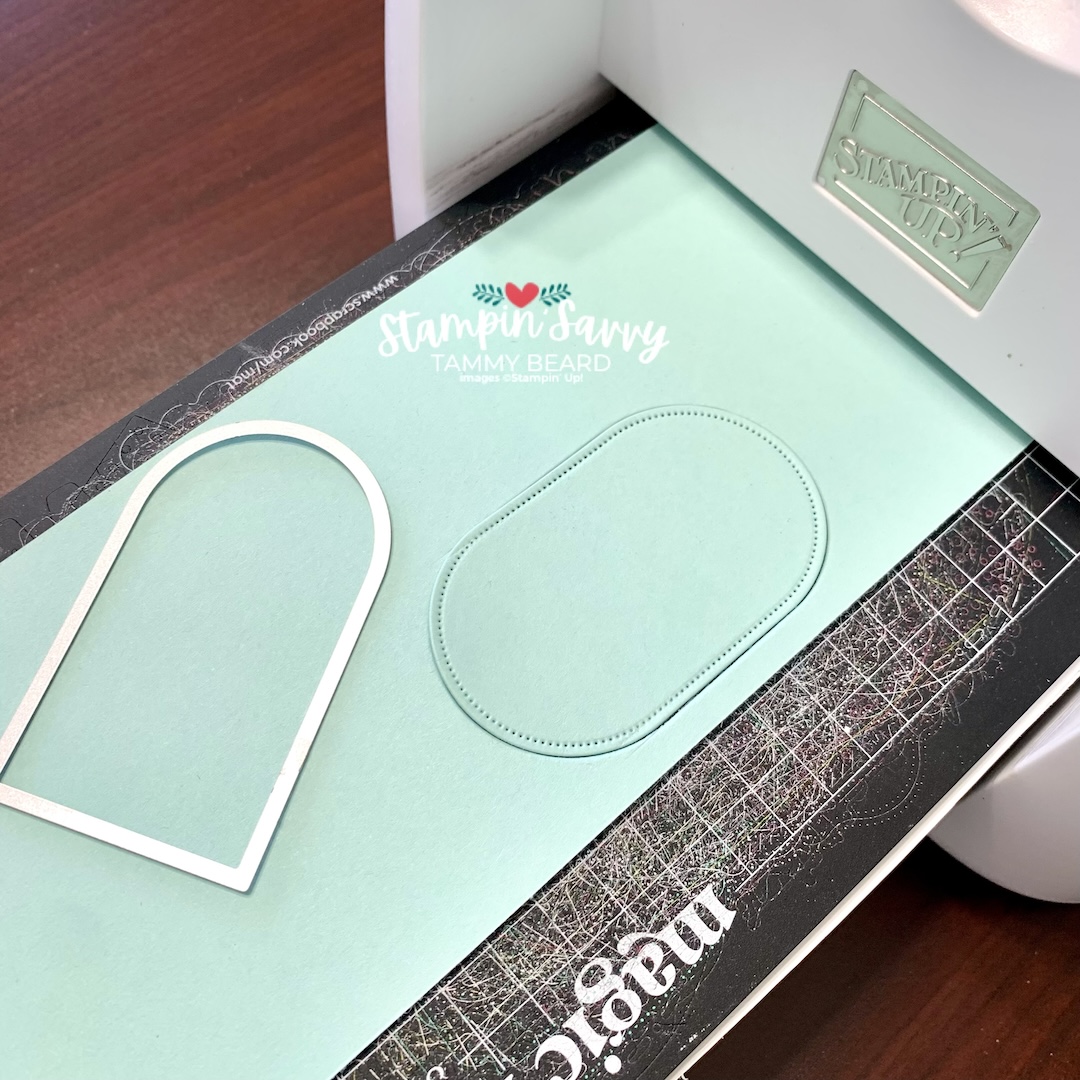
CLICK HERE FOR PHOTO of Step 1- Place die on cardstock and roll through machine about 2/3 of the way and back out. In the photo, I've set the die to the side so you can see you're not cutting the bottom of the arch.
CLICK HERE FOR PHOTO of Step 2 - Rotate the platform and place die arch-end toward the machine, aligned at the sides of the previous cut, with the embossed stitching matched (you'll feel it drop in place) and the straight end of the die even with the top of the arch* from the first cut. Roll through machine about 2/3 of the way and back out.
From arch to oval in two simple steps!
*This is how to get consistent size pieces when layering. If you're cutting an individual piece and not layering it, you can make the oval as long as the die allows.
Get free exclusive crafting tips and project ideas when you subscribe to my e-newsletter at StampinSavvy.com
Savvy Tips by Tammy Beard, Stampin' Up! Demonstrator & Paper Crafts Teacher for StampinSavvy.com.Connect with me on Facebook, Pinterest and YouTube