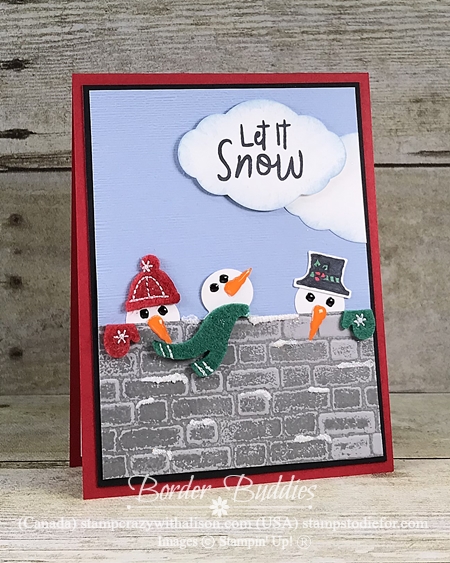
Simple Stamping Steps & Measurements
1. Fold a piece of Real Red Cardstock (5 ½” x 8 1/2”) in half to create cardbase.
2. Emboss a piece of Seaside Spray Cardstock (3 ¾” x 5”) using the Subtle Embossing Folder.
4. Ink up the Brick & Mortar Embossing Folder with Smoky Slate Ink and emboss a piece of Smoky Slate Cardstock. (2” x 3 ¾”).
5. Punch out three Whisper White Snowman with the Snowman Builder Punch.
6. Glue the snowmen peeking over the top of the embossed Smoky Slate Cardstock (if any extra snowman is showing below simply cut off)
7. Glue the Smoky Slate to the bottom of the Seaside Spray Cardstock.
8. Run thin lines of Snowfall Accents Puff Paint randomly on some of the brick tops and sprinkle a bit of Dazzling Diamond on top, then heat set till it puffs up.
9. Add the Let it Snow Embellishments to the Snowmen.
10. Stamp the hat and color with the Stampin’ Blends (Basic Black Dark, Real Red Dark & Shades Spruce Light) punch it out with the punch and glue to the top of one of the snowmen.
11. Punch out two Pretty Label Punches in Whisper White Cardstock.
12. Sponge the edges with Seaside Spray Classic Ink.
13. Glue one cloud to the right-hand side of the Seaside Spray Cardstock overhanging the edge, cut of the over hanging part.
14. Stamp Let It Snow in Tuxedo Black Memento Ink on the remaining cloud and adhere with dimensionals overlapping the other cloud.
15. Glue the Seaside Spray Cardstock to a piece of Basic Black Cardstock (4” x 5 ¼”) and glue the Basic Black to the cardfront.
16. Glue a piece of Whisper White Cardstock (4” x 5 ¼”) to the inside of the card and stamp our greeting.
For more inspiration visit my blog https://www.stampstodiefor.com/